Posts

Showing posts from May, 2017

Power Supply: The Mystery Continues

Image
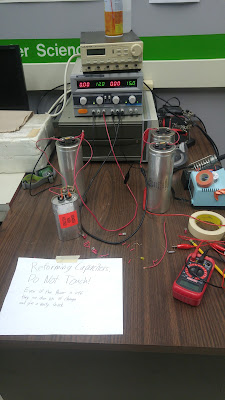
I continued testing the power supply. It would work most of the time it was powered on and give the correct voltages, but then sometimes when it was powered it the +5V circuit breaker would trip. I managed to capture this on the oscilloscope The peak voltage was 5.16V and then the breaker trips and it goes down to around 1V.  Time to keep investigating the G824 module to see if there is something wrong with it. (Michael from RICM has been very helpful with troubleshooting so far).  I borrowed a nice mixed signal scope from the EE shop. It blows my HP 54200A out of the water. The +5V regulator is supplied by the +8V line. So Michael suggested looking at both of the lines as they power on to see what they look like. Not Tripped Tripped Above are the results of this. I measured the peak voltages for both lines when they tripped and didn't trip. The +5V line averaged around 6.6V when it didn't trip and averaged around 12V when it did trip. The

More Power Supply Testing and Front Panel Testing

Image
More testing was done on the power supply. I powered it up, and it worked fine. All of the output voltages were within the allowable tolerance. I powered it up a second time after letting it sit again (still using the variac), it worked for a bit and then the newly replaced shunt resistor started to glow bright red, and I quickly powered it off.  After letting it cool down it was powered back on. It worked fine. I powered it off, then back on again but this time straight from the wall and not the variac. It worked fine. This process was repeated a couple times and I could not get the resistor to get hot again.  I will keep poking around the wiring until I figure something out.  I learned on RICM's PDP-8/I restoration blog that by reversing the +15V and ground connections on the back of the front panel all the lights will turn on. It drew about 1.5 to 2 Amps of current, but powered on and looked very pretty. Almost all of them powered up nicely, but we likel

Testing the Power Supply

Image
After the capacitors were reformed I put them back in the supply. The plug was changed to a normal 15A 120V plug (might need to be changed to a 20A plug in the future). Changing the plug proved to be more of a challenge then anticipated as the color of the wiring was confusing. I finally decided green was ground, black was hot, and white was neutral. The jumpers on the transformer were checked to make sure they were set for 120V and 60Hz. When powering on the supply I did not have an ammeter handy to measure AC current, and the one I eventually found had two blown fuses... A variac was used to slowly power up the supply. The power supply fan and the case fans kicked in and sounded fine... loud, but fine. I thought things might be OK until I saw smoke coming up from the left corner of the supply. The 0.1Ω shunt resistor had burned up on the G824 module. This needed to be replaced.   Below is the replacement. The EE shop on campus only had radial-leaded and not axial-leaded,

The Power Supply-Reforming the Capacitors

Image
The first order of business is to get the power supply up and running again. The capacitors had to be reformed before anything else could happen. All of the large capacitors were removed and wired in parallel with a large bleed resistor. They are drawing very little current from the power supply now and should be ready to go. The 8μF 660V capacitor is actually an AC capacitor, which is two electrolytic capacitors back to back. So this one will need to be reversed and reformed again. Micheal Thompson at Rhode Island Computer Museum was very helpful in explaining this process and the AC capacitor. To do: Once the capacitors are put back in the computer, we will power it on slowly with a variac. This will happen sometime in the coming week when we get the variac. The Maintenance Manual  volume II has a table with the output voltages and their tolerances that will be useful for testing. 

Tapes and Manuals

Here is a list of the tapes and manuals we have physical copies of. The tape listings are what I read from the labels. It was hard to make out the handwriting on some of them. Manuals: LAP6-DIAL Programmer's Reference Manual (3 copies) MARK12-A Formatting and Verification Program for Uncertified Tapes DIAL-MS FRED MILDRED DISPLAY CREF12 MAGSPY A Moving Window For Scanning LINC-TAPE Patch DEMO12 Monitor System Technical Reference Manual QANDA (or QUANDA) ADTAPE and ADCON Module Schematic Manual Maintenance Manual Vol. 3 Tapes: Main Dec-12-D86A-U0 Optional System Diagnostic 6-3-70 DEC-12-SEZB-U1 PART 1 LAP-6 DIAL MS DEC-12-SEZB-U1 PART 2 LAP-6 DIAL MS DIAL V2 Source Tape DECUS 12-46, 54 DECUS 12-80 DECUS 12 23, 11, 15, 57, 33 DECUS 12 7, 8 Focal Overlays DECUS 12 24, 30 MainDEC-12-DIAL-40 OS/12H FORTRAN SYS BACKUP OS/8 mH #1 Experimental OS/8 LINCtape catalog OS/8 DEC-12-SE2D-UO LAP-6-DIAL SYSTEM 1 DEMO 12 #1 1/4/72 OS/8 ASLIN #3 ADTAPE OS/8  A

The Beginning

Image
Hi! My name is Dawson and this blog will be documenting the restoration process of a DEC PDP-12. As stated in the "About" section, this machine has sat untouched for a long time and appears to be in very good condition. This is PDP-12 #435. We initially assumed that because it been sitting untouched for so long, it would still be in one piece and everything would be there. Well... that turns out not to be the case. Upon further inspection it appears that at some point in this machines life someone took one of the 4k core stacks of memory. The machine appears to have originally configured to run with 8k, meaning it should have come with 8k from the factory. Nothing else appears to be missing yet that we know of. A more detailed inspection of the installed Flip Chips and other components will happen soon. Along with the computer we received many of the original manuals and tapes. I will put these in another blog post for ease of reference. Upcoming on the restoration agen